Note: If QB is your source of record for inventory, you must update your inventory in QB, not Vinosmith
There are 3 steps to update inventory in bulk: export inventory, update the Excel data, and upload the updated data.
1. Export your current inventory (see article here for steps)
Inventory can be exported in two ways.
Method 1: Only export inventory records that already exist.
Method 2: Export inventory records for all wines. For wines without inventory, you can assign a default warehouse in the export file.
Export can be a Detailed file or a Basic file
The Detailed file has more data points that can be changed
2. Edit the document to reflect the current inventory.
Please review these Import Instructions to help identify which columns are required and the formatting for a successful upload. Not all columns in the file are updatable; they are only for reference.
Tip -- please save a copy of the original spreadsheet in the event that the data needs to be reverted back
3. Upload this document back to Vinosmith:
Click on the Wines tab
On the left, click on Import Inventory
On the next screen, click on the Basic tab
On the next screen, you can choose how a Wine should be identified for the update and choose the target warehouse
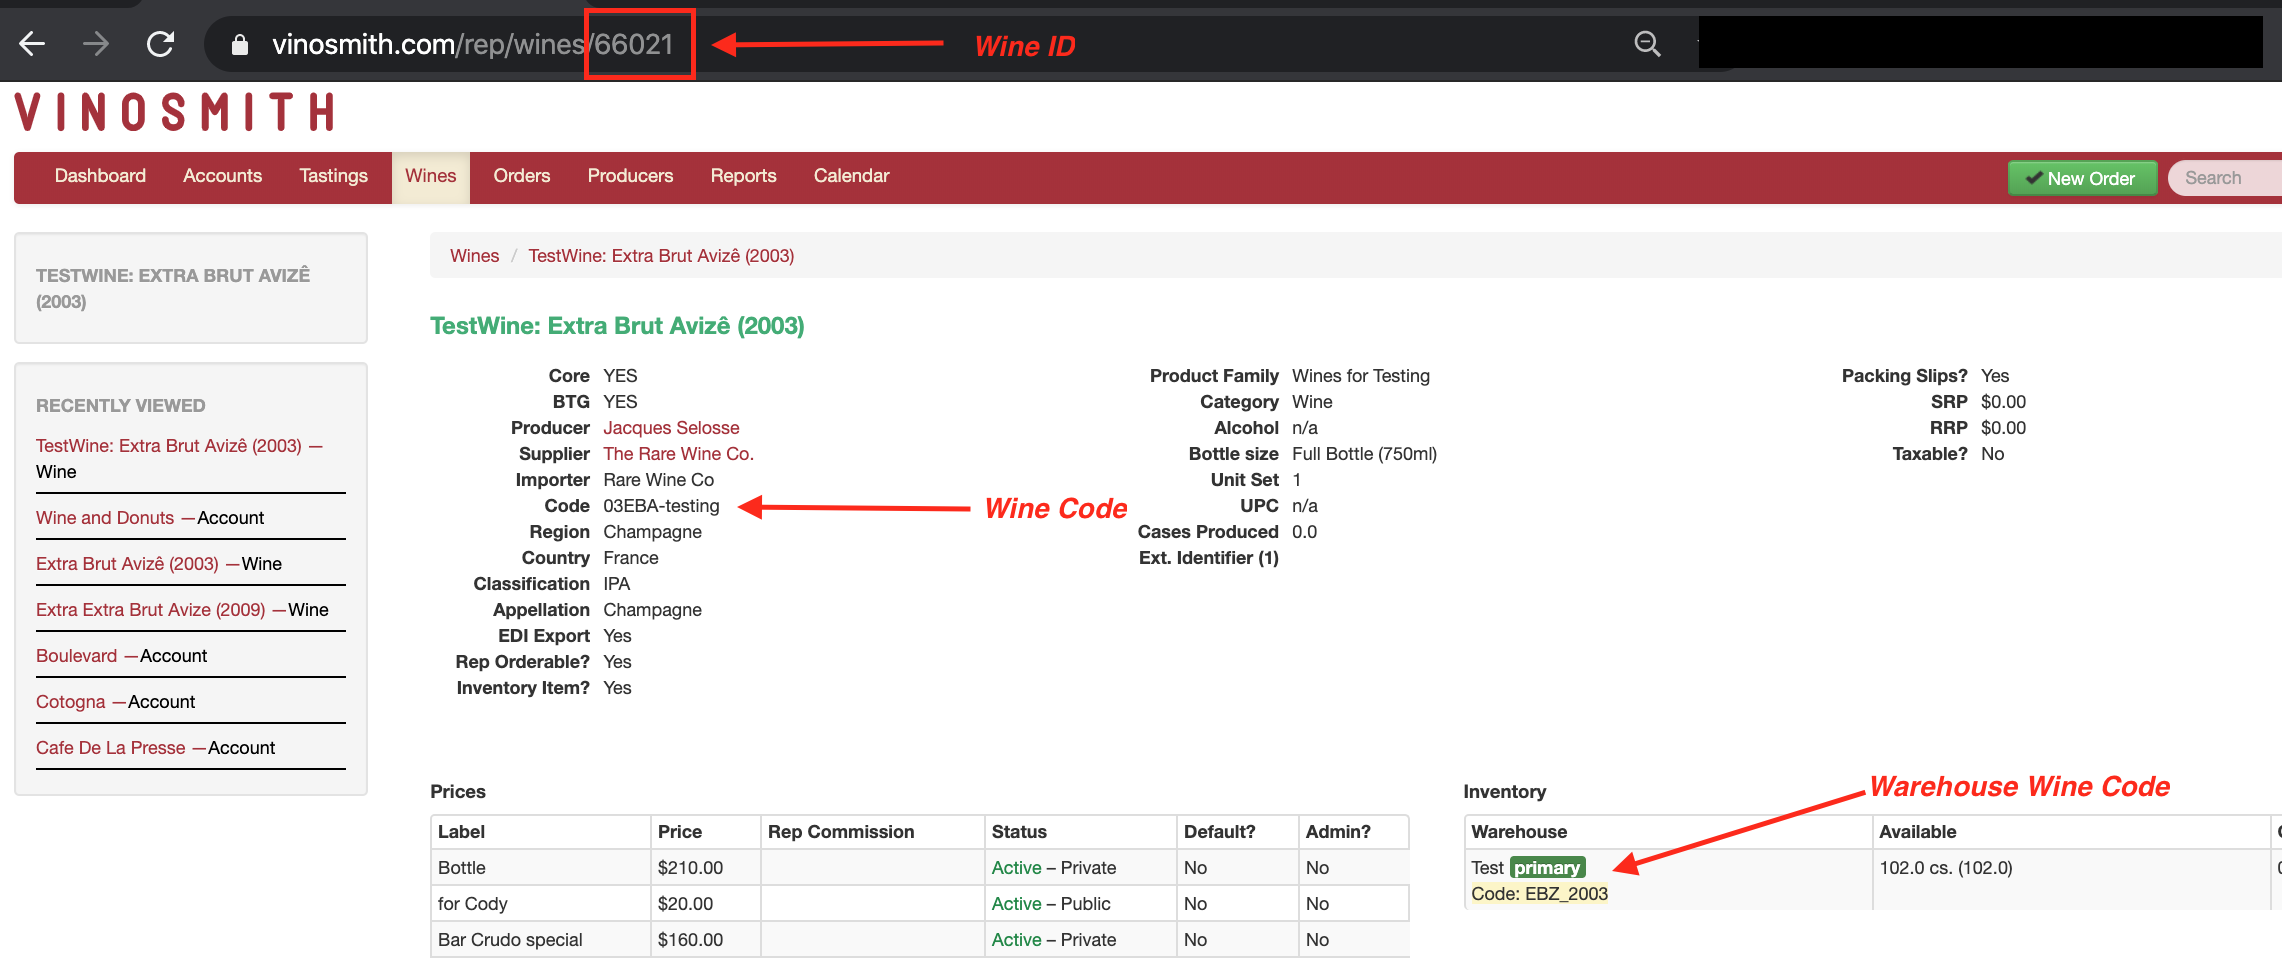
Wine Identifier - (What does the wine code in column A represent?)
Wine Code: top-level wine code in Vinosmith
Warehouse Wine Code: the wine code at the Inventory level. To use this option, this value must be present and available at the inventory level. Please Note: This is NOT the code of the warehouse itself.
Wine ID: the wine record's unique ID in Vinosmith; the number found at the end of the URL
Strip Prefix? (Optional)
This is only relevant when Wine Identifier is set to Wine Code.
If the input file contains wine codes with a prefix, Vinosmith can remove that prefix prior to looking for the wine. Example: The input file contains wine code(s) like ABCPN2012 but your Vinosmith Wine Code is ABC you would enter "ABC" and Vinosmith will look for a wine with code PN2012
You can also create a brand new inventory record if one does not already exist. This is done by toggling the drop-down Create New Records?
Please note: to use Create New Records? it's required for the Wine Identifier to be Wine Code -or- Wine ID: because there is no existing inventory record to locate.
Do NOT Update Quantity? If your goal is to update other inventory information, like BIN values or Warehouse Codes, and you do not want quantities to be updated, check this option. Only relevant for updates. If the inventory record is being created because it does not already exist, the quantity will be imported.
Finally, specify the file and upload it
Helpful Tip
In most cases, if you just have an item code and the new inventory quantity you would like that item to be reset to, you will want to perform a "Basic" Inventory Import. You can create your own excel file with the following headers and upload it via the Basic Inventory Import screen.
The Excel sheet should have three columns:
Upload Type (inventory-basic)
Wine Code
Quantity
Please note: For the Quantity value, enter a single decimal number using bottle conversions. For a chart of valid bottle conversions, please see this article
Warehouse Code (optional)
Bin Location (optional)
Vinosmith expects the first row to be this header, so your data should start at row 2.